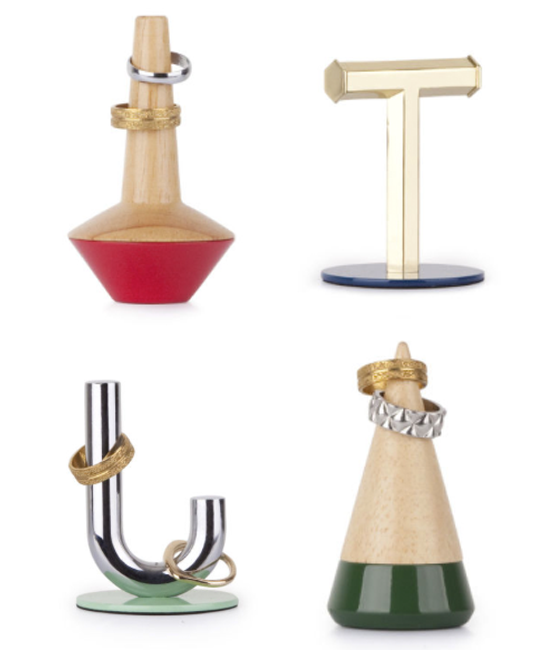
These four small geo ring holders designed by Alan Wisniewski for Umbra are practically sculptures in their own right. Each of the designs measures about 4-inches tall, making them perfect for small spaces or gifting to your artsy friends and family. Oh, and they’re super affordable as a bonus.
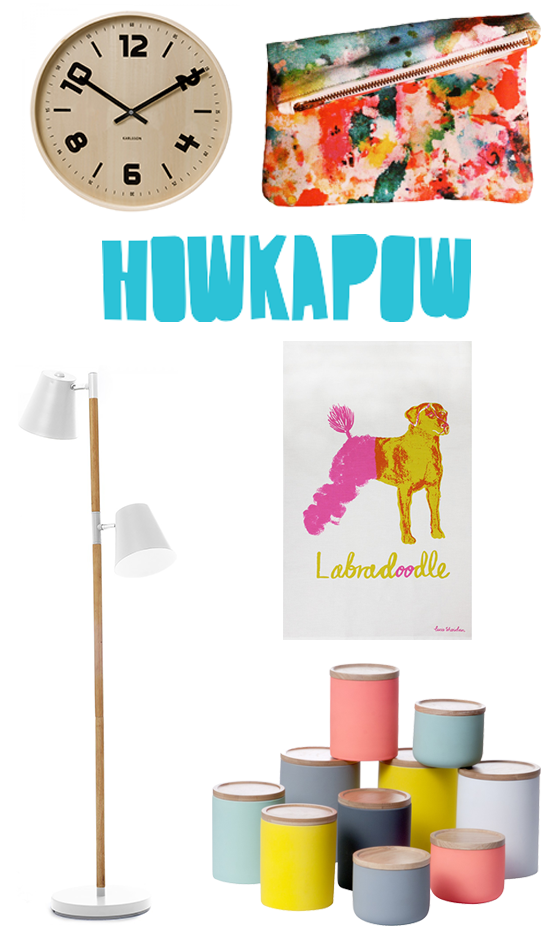
Bristol, England-based Howkapow brings a smile to my face every time I visit them online. Their shop is full of innovative, fun, interesting work from breakthrough talent as well as a few carefully-chosen independent, family-run brands. There’s an ever-changing collection of unusual pieces at affordable prices, and their spring collection was just recently released so I thought I’d share a few of my favorites with you.
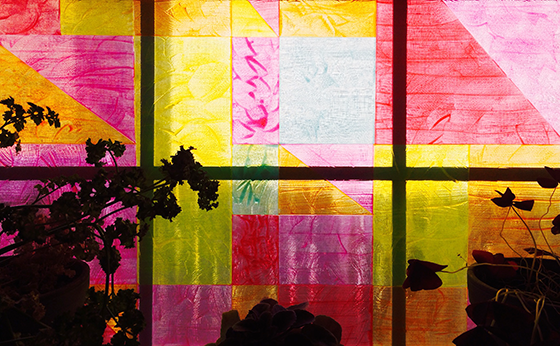
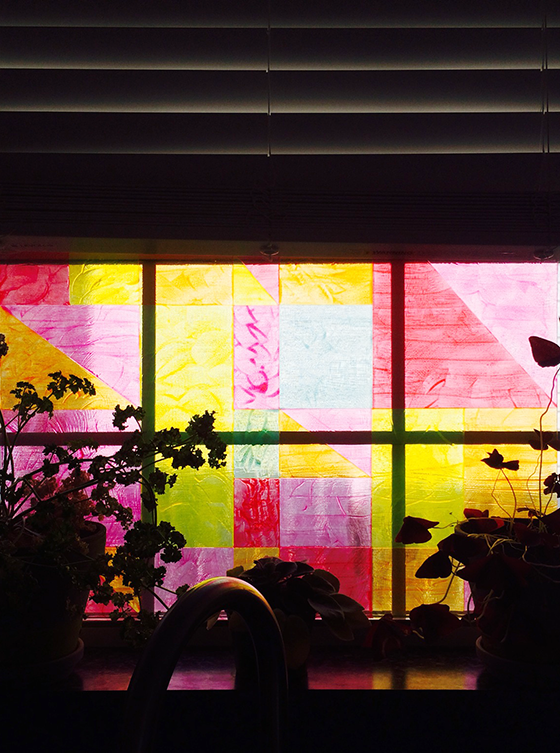
The window over my kitchen sink is one of my favorite places in the house. The few plants that I’ve managed to keep alive spend their time there, it gets great light for almost the entire day, and I love it when a breeze is blowing in. I thought I’d give it a little DIY attention by creating a sort of faux stained glass window, and I’m digging the new (not at all permanent) result!
Materials:
• plexiglass sheet cut to the size of your window
• piece of white paper or poster board
• ruler
• pencil
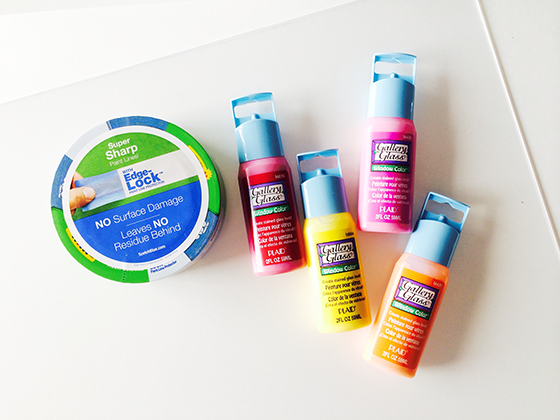
• stained glass paints
• ScotchBlue™ Painter’s Tape
• smallish paint brush (I used one that is 3/4″ wide)
• paper towels
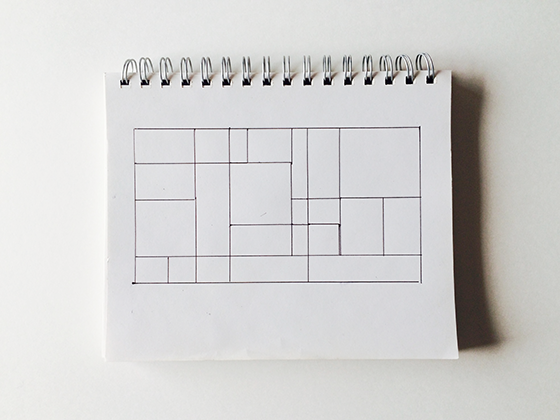
Let’s get started! First thing first, get out a piece of paper or your sketchbook and get to work drawing a rough idea of what you’d like your finished window to look like. I knew that I wanted something Mondrian-inspired with 4-5 colors.
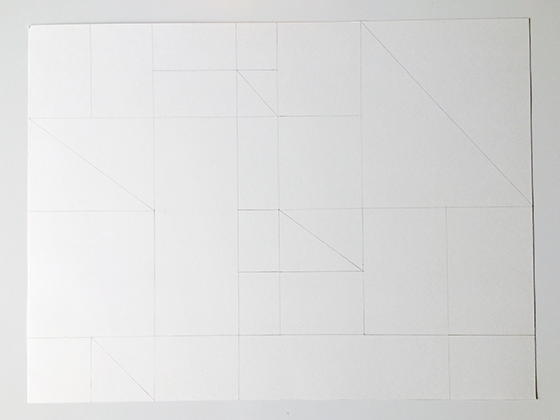
Next you’re going to transfer your idea to a piece of paper or poster board that’s cut to the same size as the piece of plexiglass. Like I said, the sketch was just a rough idea, this will be the real thing that acts as your direct template. I started by going off of my drawing and quickly branched out to something a little more geometric. Some of my original areas were too large, so I broke them down into triangles to add some interest. But really it’s all about what looks good to your eye.
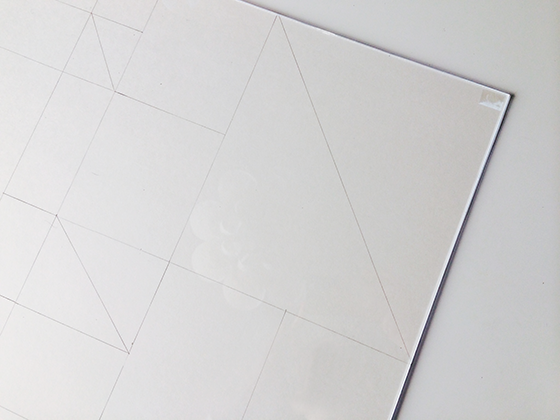
Once you’re content with your finalized drawing, lay it behind the piece of plexiglass. (There may be sheets of acetate on both sides for protection, so make sure you remove that first.) Use a small piece of tape in each corner to affix the two together.
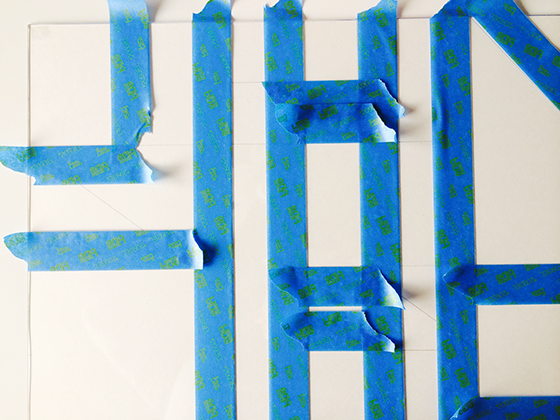
Now it’s time to get taping! You’ll need to work in small sections, I tried to tape off the largest areas first and went from there. There will be lots of drying time in between taping, so even though this project may take a bit to complete (depending on the size of your window) there’s considerable downtime.
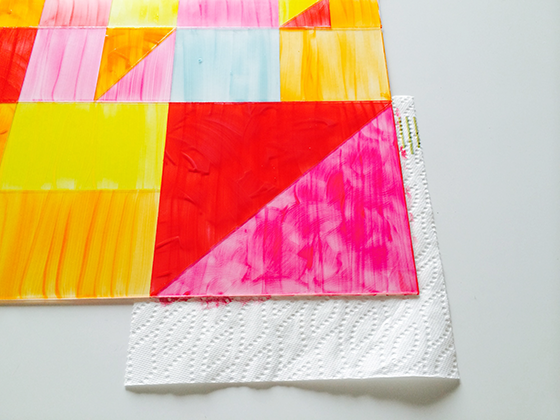
Once you’ve taped off all of the sections you’re going to want to take a minute and think about he layout of your color palette. You don’t want any sections touching that are the same hue. Prep the edges of your plexiglass by laying paper towels (or newspaper) under the entire perimeter. Once you’re all set, squirt a bit of your first color of paint onto a section and gently paint it using horizontal strokes. It will look a little thin and that’s okay. Make sure and paint over the edge of the tape as you go. Rinse your brush and repeat until all taped off sections are painted. Now this is important, remove the tape while the paint is still wet. It’s crucial to creating a crisp line.
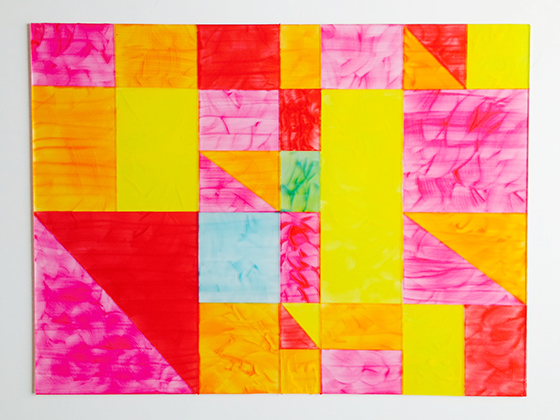
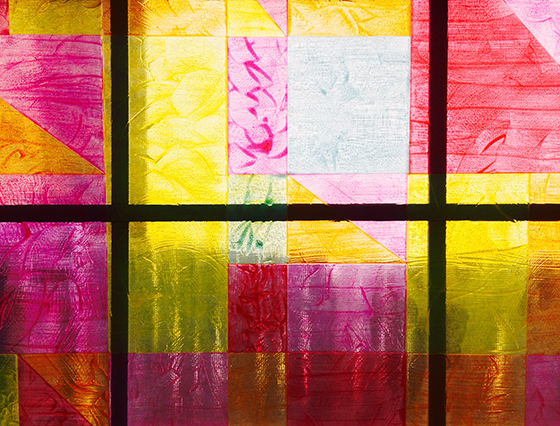
Wait 30 to 45 minutes for your newly painted sections to dry, then tape off a new set of shapes and repeat the process until they’re all filled in. At this point you might be happy and ready to call it a day. I opted to do a second coat because I’m crazy like that. This time around I kind of swirled my paint around instead of using clean strokes. Once it dries there’s more depth and unevenness, which makes it look more like stained glass.
When you’re through remove the paper guide from the back of the plexiglass and have a good look. There might be an edge here or there that could stand a little touchup. Now it’s time to make your window happy! If there’s a ledge you might want to simply lean your work of art against the window, or use glue dots around the edges to make it a little permanent. Either way, voila!
To help you get a head start on your own faux stained glass project, or whatever else you might have up your sleeve, we’re giving away a $50 e-GiftCard to Home Depot!
To Enter:
1. Join the Home Depot super fan program.
2. Pop back here and leave a comment letting me know you’re now a member.
3. Do it all before Tuesday, April 8th at 11:59pm CST.
We’ll randomly choose a winner the next day and let you know if you’re a winner!
I am proud to be a 3M- sponsored blogger, and, as part of my responsibilities, I get the opportunity to evaluate new products from ScotchBlue Tape. Opinions are my own and additional product used in the project were selected by me.
Check out be packs, started by outdoorsman Rory Rogan who set out to make the perfect pack to carry his gear. be packs works with the African Education Program, giving $10 from every sale toward youth education in Zambia where secondary school must be paid for by the student. Every twenty bags sold provides a child with a year of education, one meal a day for the entire year, and their school uniform. Stitched inside every be pack you’ll find a Hope Patch, which has handwritten messages by children in Zambia. Now that’s a lot to fit in a backpack. (PS: The bags are all made in the USA and are UV, water, and mildew resistant.)
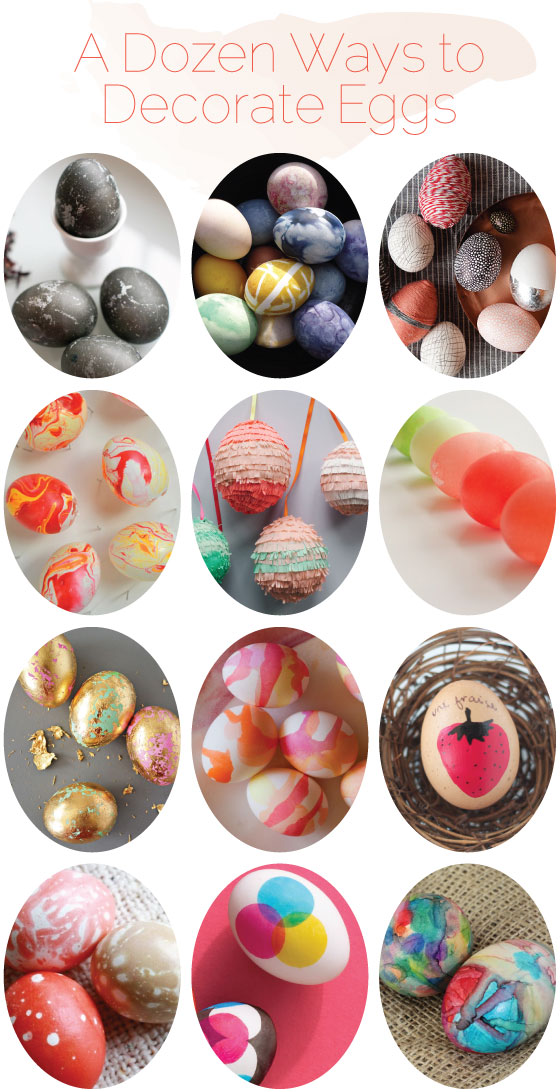
At some point my Easter focus shifted from shoving chocolate bunnies and marshmallow Peeps into my face and onto the art of decorating an awesome egg. My mom and I have had a tradition of dyeing a dozen or two together each spring since I was little. I love our time spent together, but our go-to has been a box of Paas most years and I’m ready to mix it up a bit. Last year we branched out a bit by creating some ombre striped eggs and this year I’d love to take it even further.
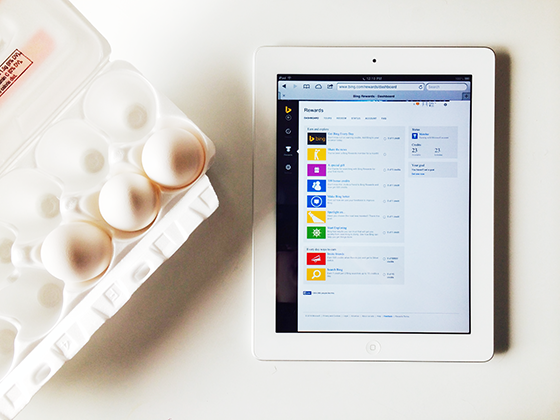
With Easter less than three weeks away, I started looking for my perfect project by doing a little research on Bing which is now iOS compatible. I recently switched my settings on my phone to make it my primary search engine, and to take advantage of Bing Rewards . Create an account for free and earn points that are good for gift cards to your favorite stores and other rewards by doing searches. There are new opportunities to earn points daily. That’s right, earn points towards gift cards for projects you’re searching – magic.
A bunch of colorful options popped up immediately and I narrowed them down. (I don’t like eating hardboiled eggs, so keeping them edible wasn’t necessary.) I ended up with a dozen keepers that are in the running and currently being passed on to the deciding deity – my mom – for a final decision. Which is your favorite?
I’m required to disclose a sponsored partnership between our site and Bing. I have been compensated in exchange for this post in the form of payment, product or experiences. Thank you for supporting the brands that help keep Design Crush going!