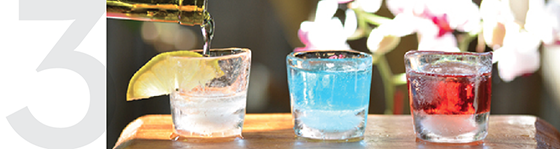
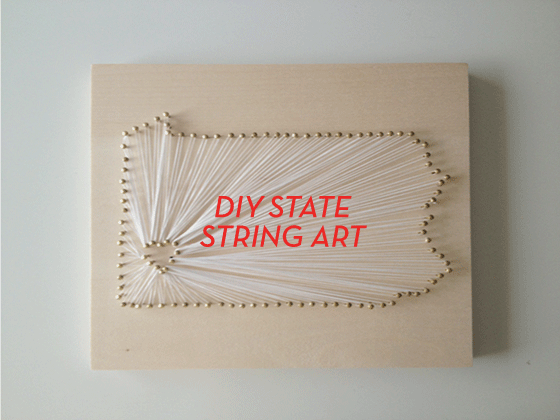
DIY Color Washed Glasses
I love a tall glass tumbler more than just about any other glassware, really I do. But sometimes those guys are just sitting there like a blank canvas in the cabinet, waiting for a makeover. These Color Washed Glasses are a breeze to make and can look as fancified or casual as you want!

All you need:
• a set of straight-sided glasses (I used tall tumblers, but you can use whatever)
• ScotchBlue™ Painter’s Tape
• acrylic paint in the color(s) of your choice
• 3/4″ acrylic paint brush
• paint palette (i.e. paper plate)
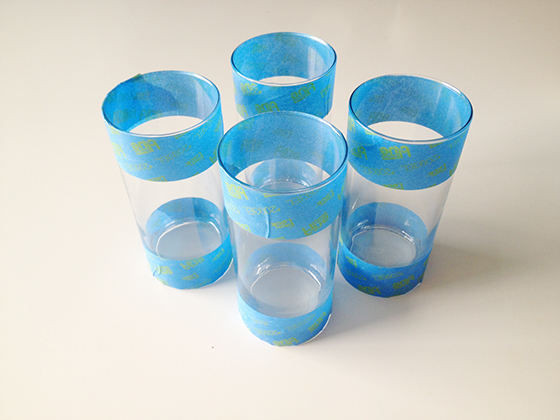
The first thing I did was wash and dry the glasses thoroughly, and then I taped them off. Because they’re going to be used primarily for beverages I wanted to make sure the paint was nowhere near the lip, so I simply used the width of the ScotchBlue Painter’s Tape as a measuring guide. You can opt to paint all the way down to the base of the glass, but I wanted to balance out the spacing at the top with a second strip of tape at the bottom. Since the glasses aren’t exactly straight up and down there will be a small amount of gapping with the ScotchBlue™ Painter’s Tape, simply smooth it down using your fingernail by pushing down and towards the edge.
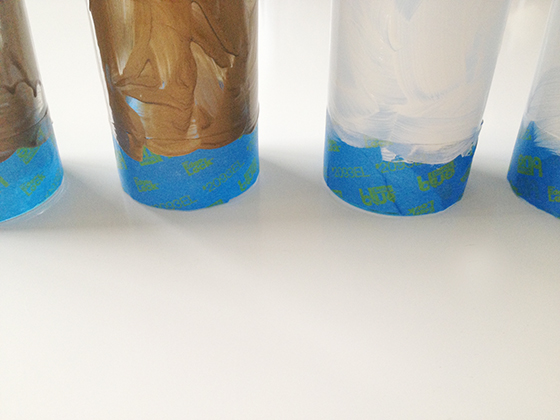
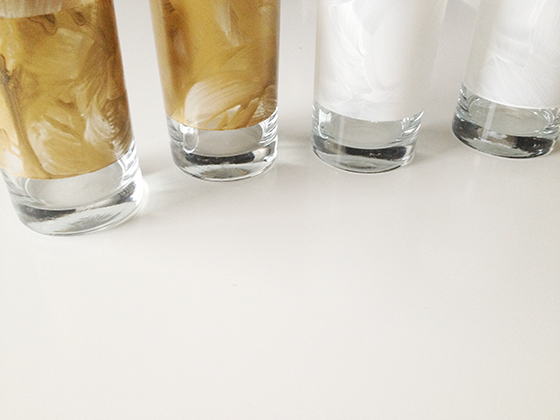
Next, squeeze a quarter-sized dollop of paint onto your palette surface (I always use a small paper plate) and load up your brush. Get to work sweeping and swashing over the exposed part of each glass, making sure to overlap the ScotchBlue™ Painter’s Tape slightly. You want a random look, so go crazy swooping and swashing!
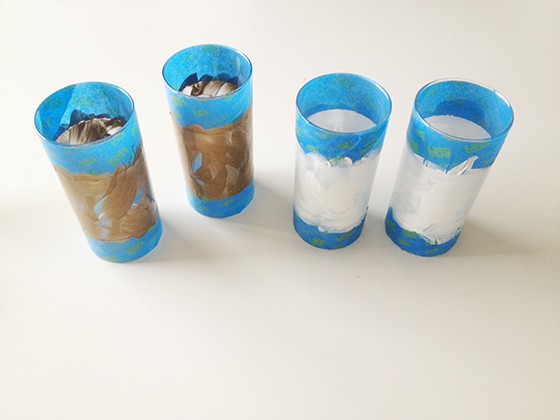
These glasses only required one layer of paint because we aren’t going for a solid opaque look. I set them aside to dry for about half an hour before removing the ScotchBlue™ Painter’s Tape.
 .
.

The edges came out very clean, and in the few spots that bled through I used my nail to scrape off the excess before the pain set completely.

Huzzah! Time to sit back with an icy drink and enjoy the fruits of your labor. Because these are hand-painted you’ll need to hand wash these guys after using, or risk all of the paint coming off in the dishwasher – but you totally knew that already, right? I also plan on using these as small vases this fall, I think some brightly colored mums would look incredible with both the gold and white!


This post is a collaboration with ScotchBlue™ Painter’s Tape Brand. Join the community at Facebook.com/scotchblue or visit scotchblue.com to learn more.
ScotchBlue™ Painter’s Tape | ScotchBlue™ Painter’s Tape Facebook Page | ScotchBlue™ Painter’s Tape Twitter Page | ScotchBlue™ Painter’s Tape YouTube Page | ScotchBlue™ Painter’s Tape Pinterest Page
Posted In house and home, kitchen, make it, sponsored post