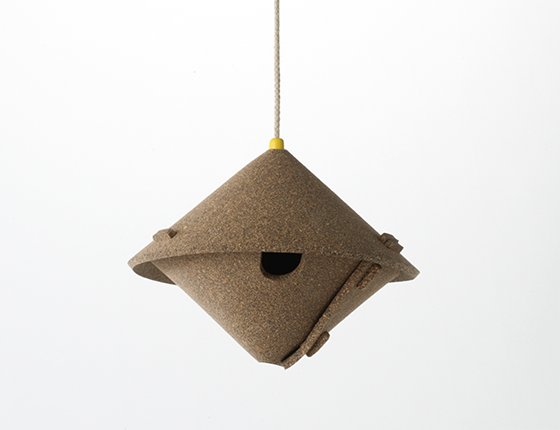
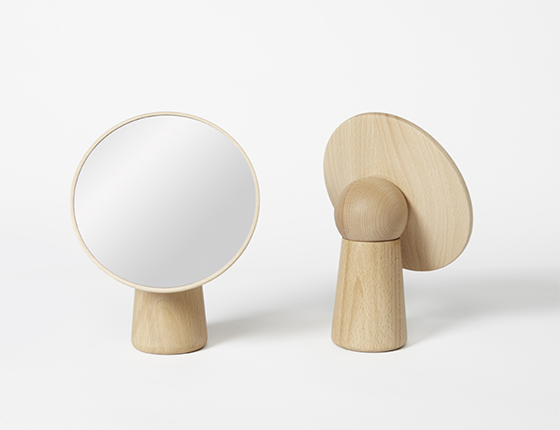
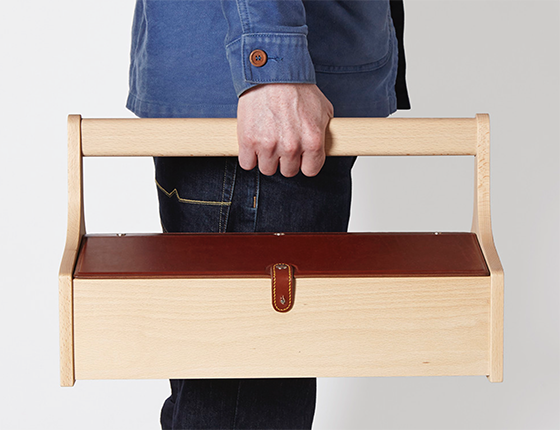
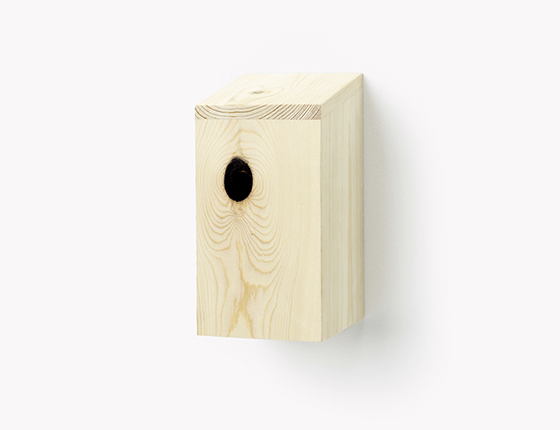
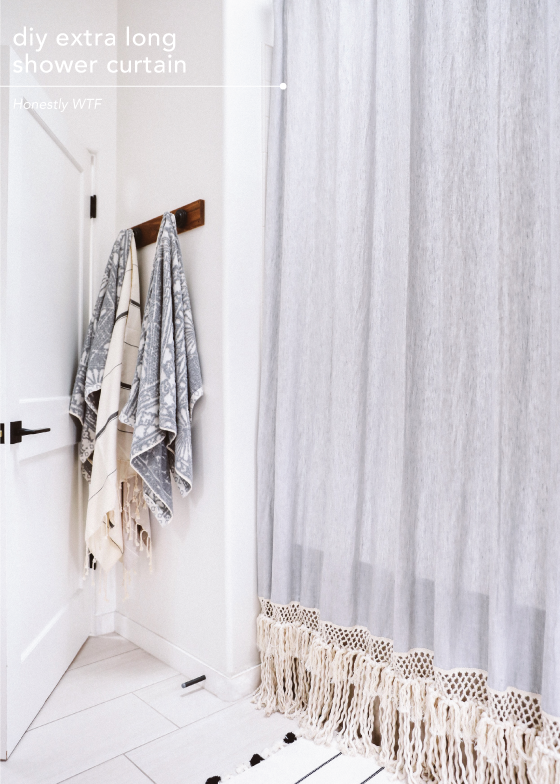
You know that person who is super creative and can make just about anything? That’s Gavin Coyle, a studio workshop based in East London dedicated to preserving the skills of traditional craftsmanship in new ways. They’re an incredibly innovative group with a less is more ethos who create as little waste during production as possible. Check out their shop or request a bespoke piece all your own.
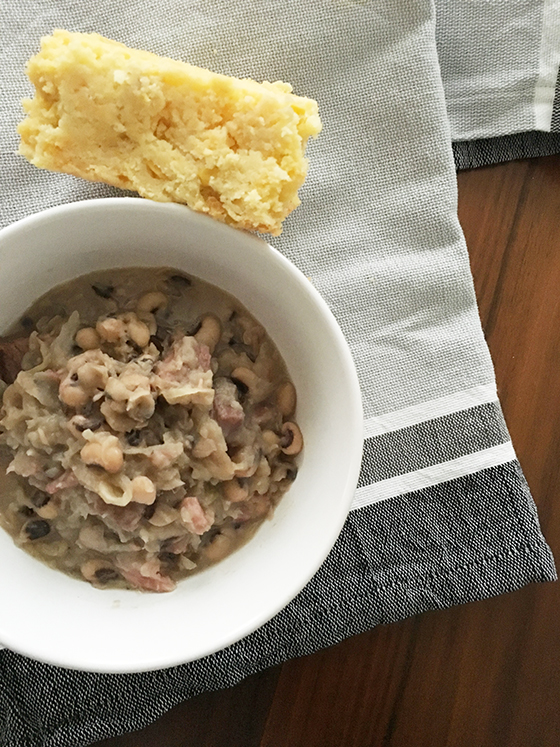
I know I said I wouldn’t be back until after the new year, but I couldn’t let it slip by without sharing this recipe! My mom makes a big pot of black-eyed peas and a piping hot pan of cornbread every New Year’s Day. Superstition has it that eating a bowl will bring you luck in the coming year, and I’m not one to mess with that kind of science! This dish is one she has stored in the recipe box of her mind and has never been shared before, so this is *kind of* a big deal. It’s also very versatile. Add more beans, leave out the sauerkraut, cut back on the meat? All totally doable. We like to place a piece of cornbread in the bottom of a bowl and cover it with the beans before digging in. Here’s to a fantastic 2018!
New Year’s Day Black-Eyed Peas • 1 bag dried black-eyed peas, soaked overnight in a large pot of cold water
• 1 large sweet yellow onion
• 4 cloves of garlic, minced
• 2-3 large ham hocks
• 1 ring of Polish Kielbasa or Polish Sausage, sliced into 1-inch quartered pieces
• 1 ham steak, fried and cut into small 1/2-inch pieces
• 12 oz sauerkraut, drained
• red pepper to taste
Drain peas and rinse well, removing any bad ones. Combine black-eyed peas, onion, garlic, ham hocks, Kielbasa, and ham steak in a very large stock pot, then fill with water to cover. Set on low heat, stirring occasionally. Mixture will thicken as it cooks. Cook until black-eyed peas are tender and ham hocks are cooked through and falling apart. Remove ham hocks from pot and remove meat from bones, then add meat back to the pea mixture. Discard scraps and add sauerkraut and red pepper to taste. Cook for additional 15 minutes. Total cook time varies, but is usually in the three to four hour range.
The Best Cornbread • 1 C butter, softened
• 2 – 8 oz cans corn, drained
• 2 – 8 oz cans creamed corn
• 4 eggs, lightly beaten
• 2 C shredded sharp cheddar cheese
• 2 – 8.5 oz boxes Jiffy cornbread mix
Preheat oven to 350º. In a large bowl stir together all ingredients until blended (do not beat with mixer). Pour into a greased and floured 9” x 13” cake pan. Bake one hour or until the top is lightly browned. Enjoy!
With the exception of one post next week, I’m closing up shop until January! Wishing you all a fantastic end of the year, no matter what holiday(s) you’re celebrating or not celebrating. I hope you’re surrounded by warmth and comfort and love and know that it means the world that you allow Design Crush to be the tiniest part of your life.
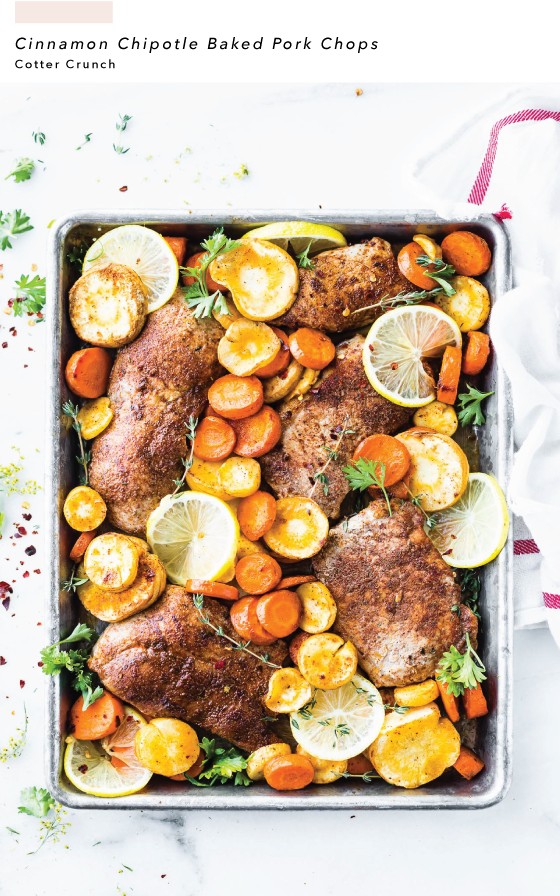
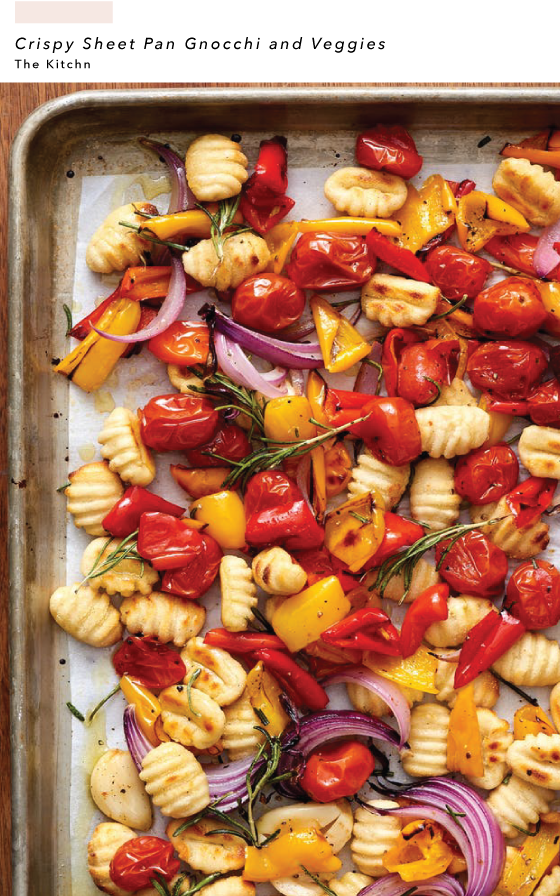
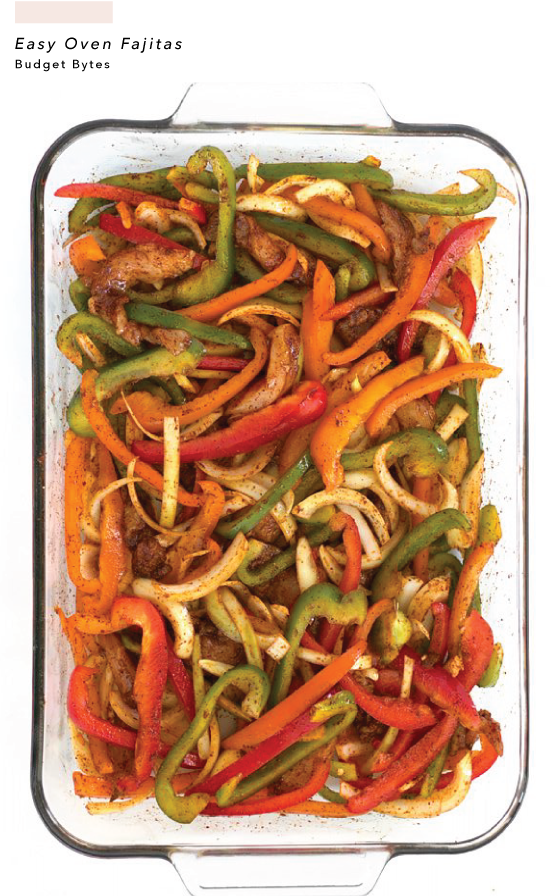
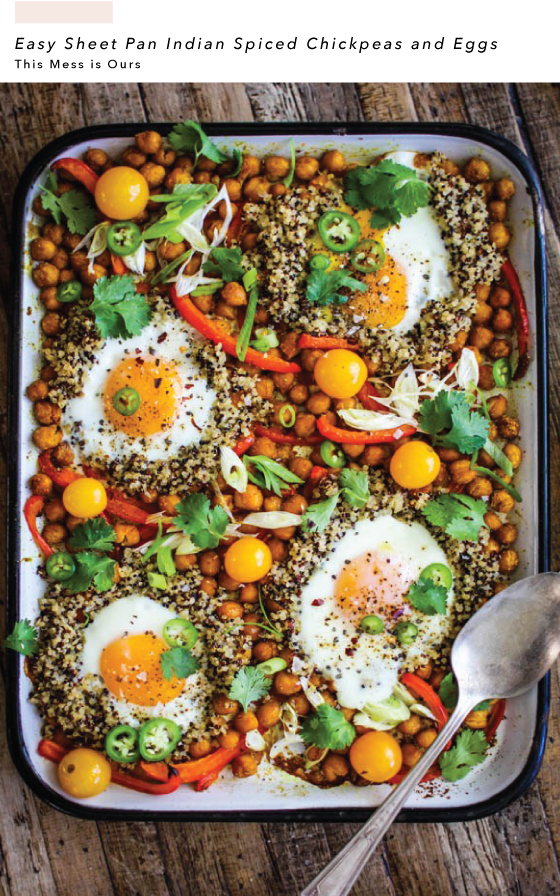
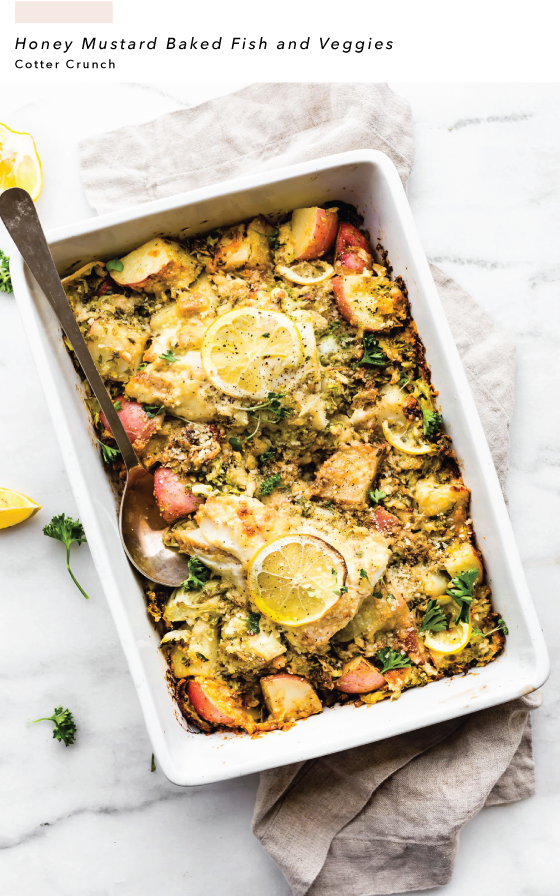
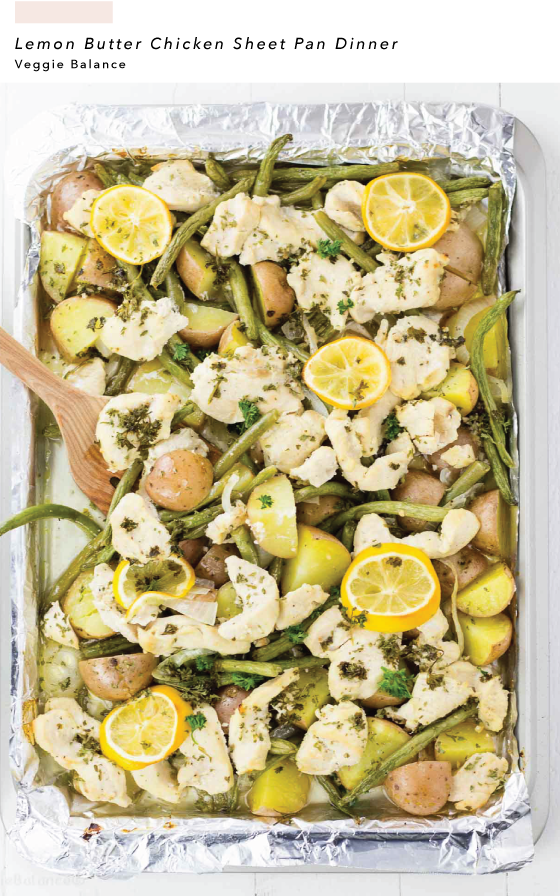
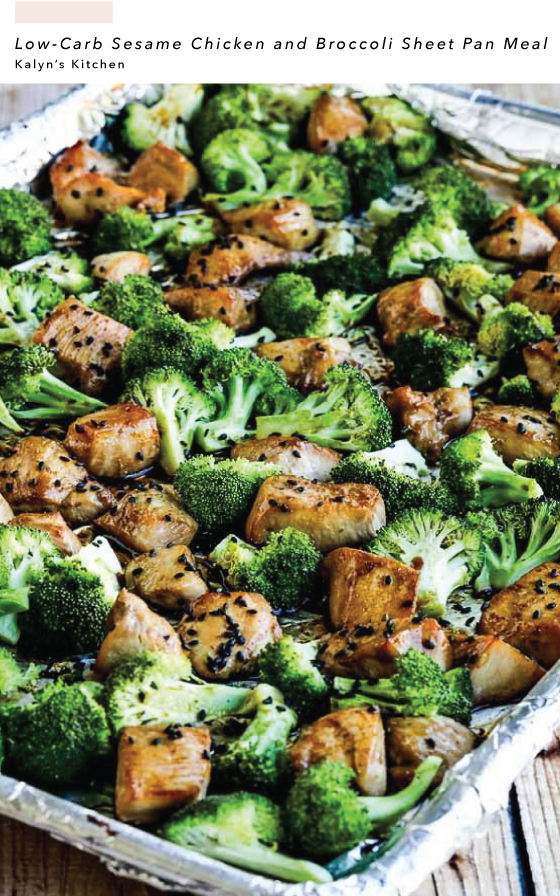
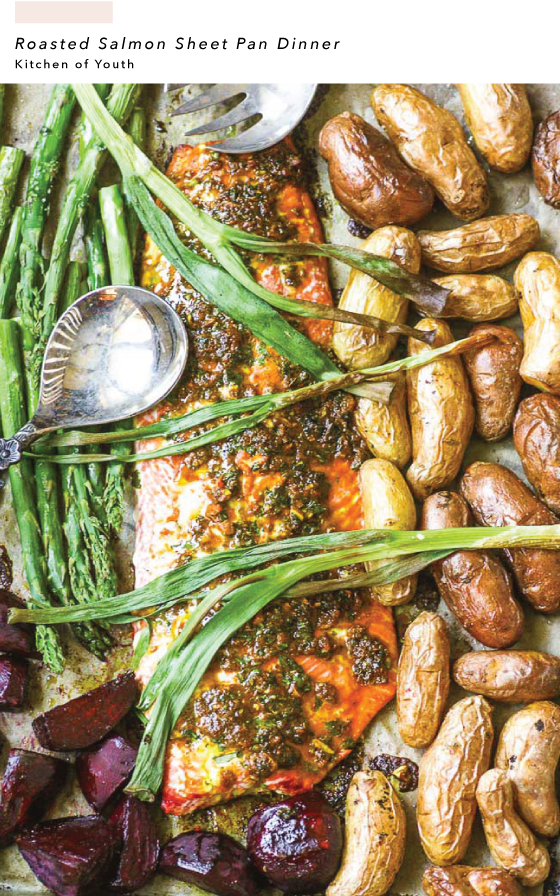
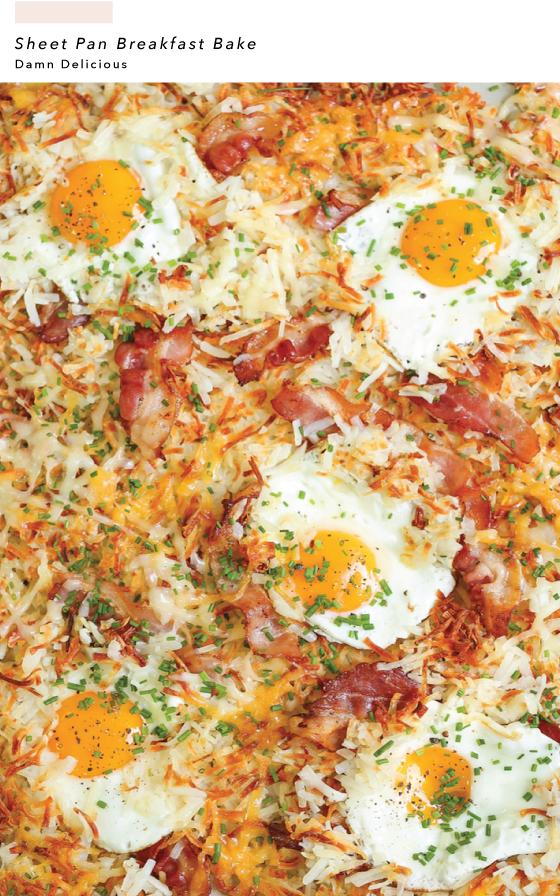
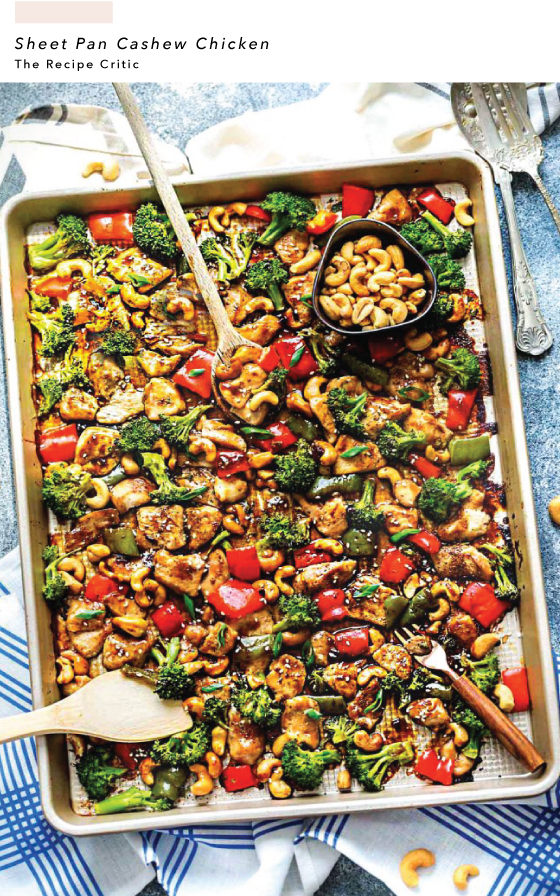
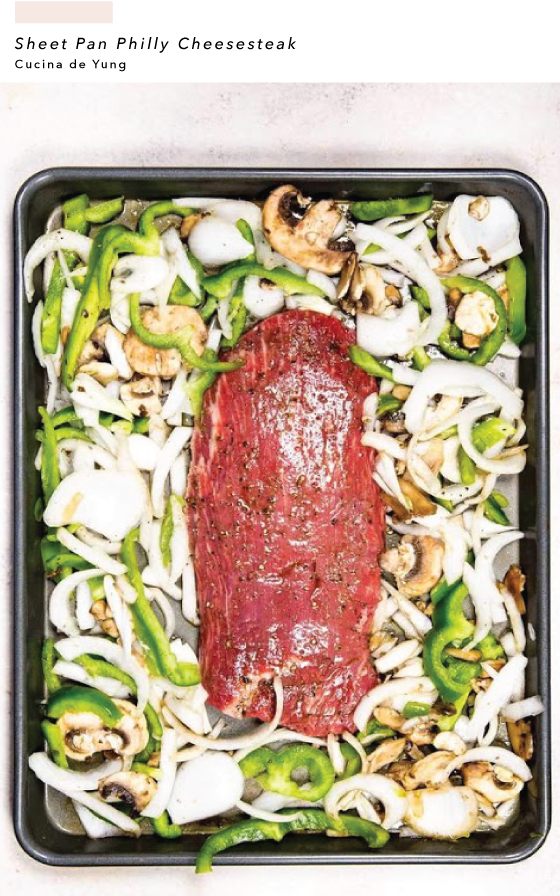
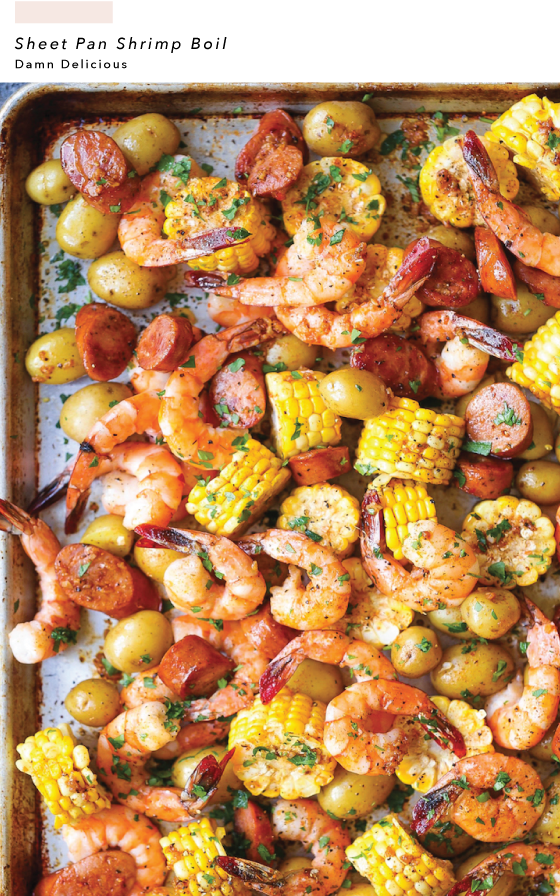
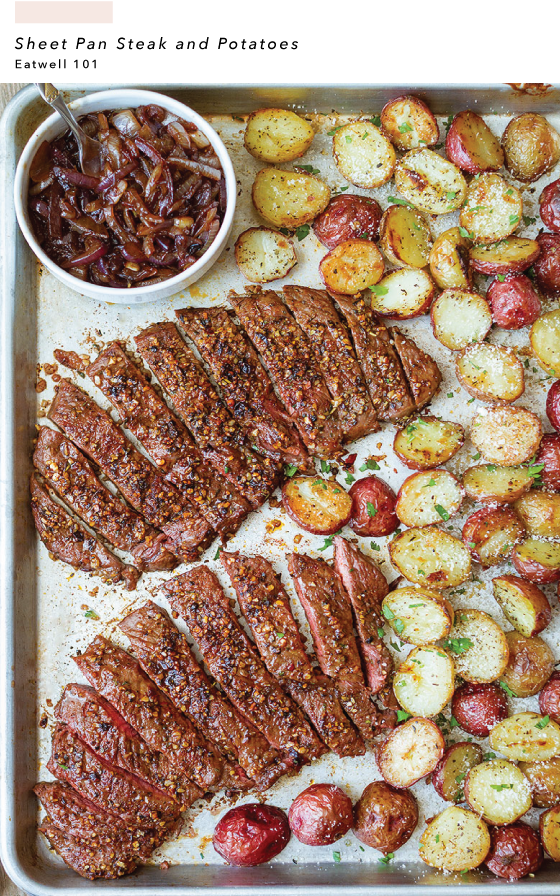
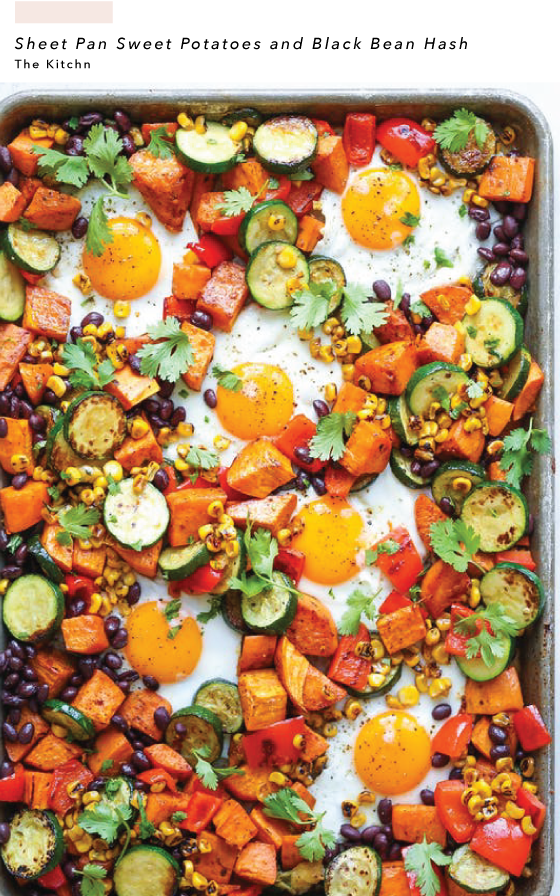
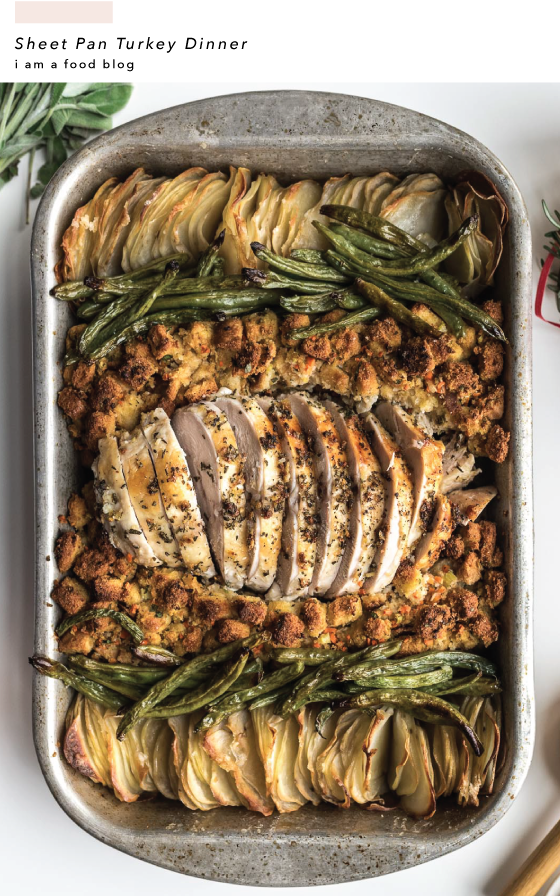
Sheet pan – or one pan – meals serve a myriad of purposes this time of year. First, they’re easy and fairly healthy during a time when you’re *probably* indulging more than usual. Second, they’re a reason to use the oven and add extra heat to your home. (Can you tell mine has been freezing??) Third, there’s minimal cleanup involved which is honestly always plus in my book. I’m very much looking forward to trying out some of these recipes this winter!
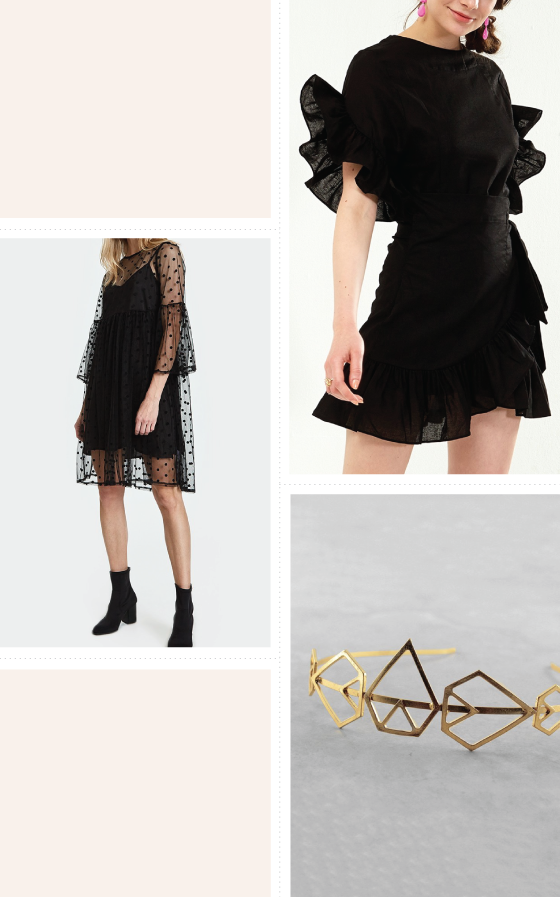
If you’re someone who looks forward to doing it up big for New Year’s Eve, well, I know you’re already thinking about your outfit. While I try to get away with wearing pajamas to my friend’s party, you’ll be painting the town red in satin, sequins, and tulle and shuffling down sidewalks in shoes that are not at all winter weather appropriate… and I salute you. It wasn’t so long ago that I did the same, it’s just that these days I prefer not to fight the crowds on super busy nights out. What I do like is picking out what I might wear if I were braving it out there, and sharing all of those sweet finds (and SALES!) with you.
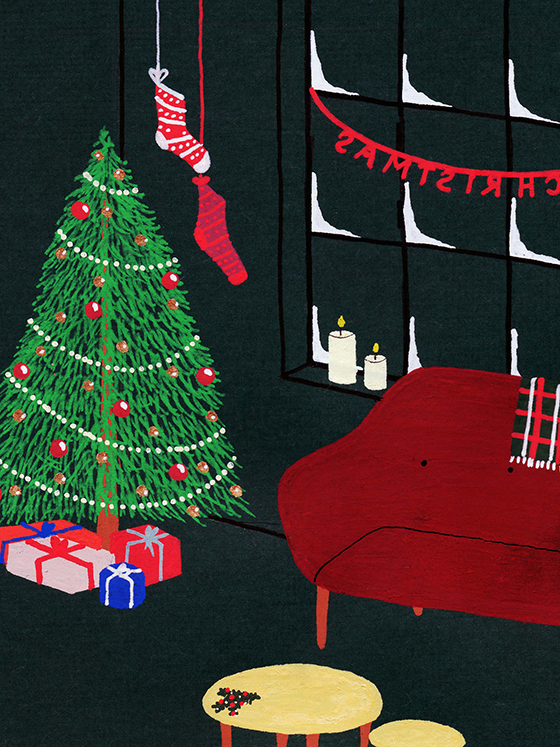
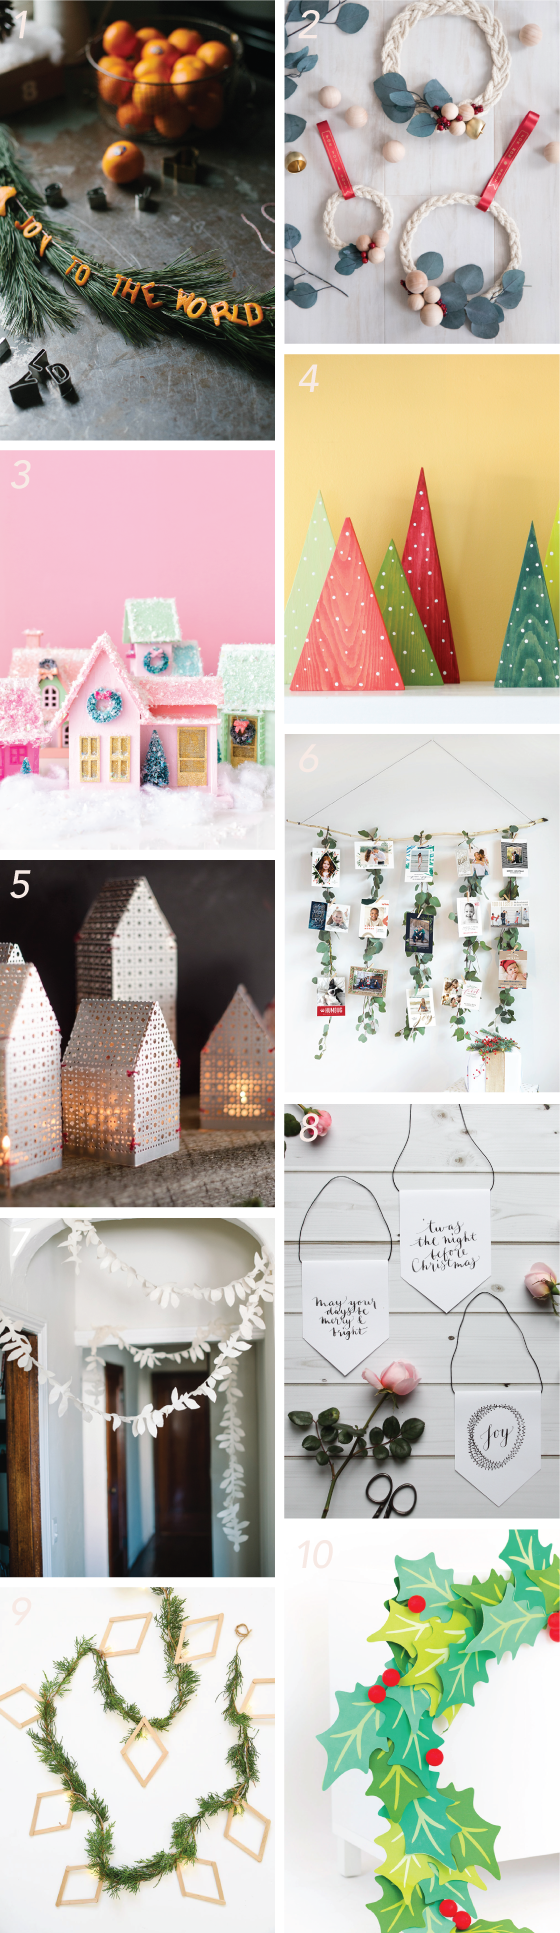
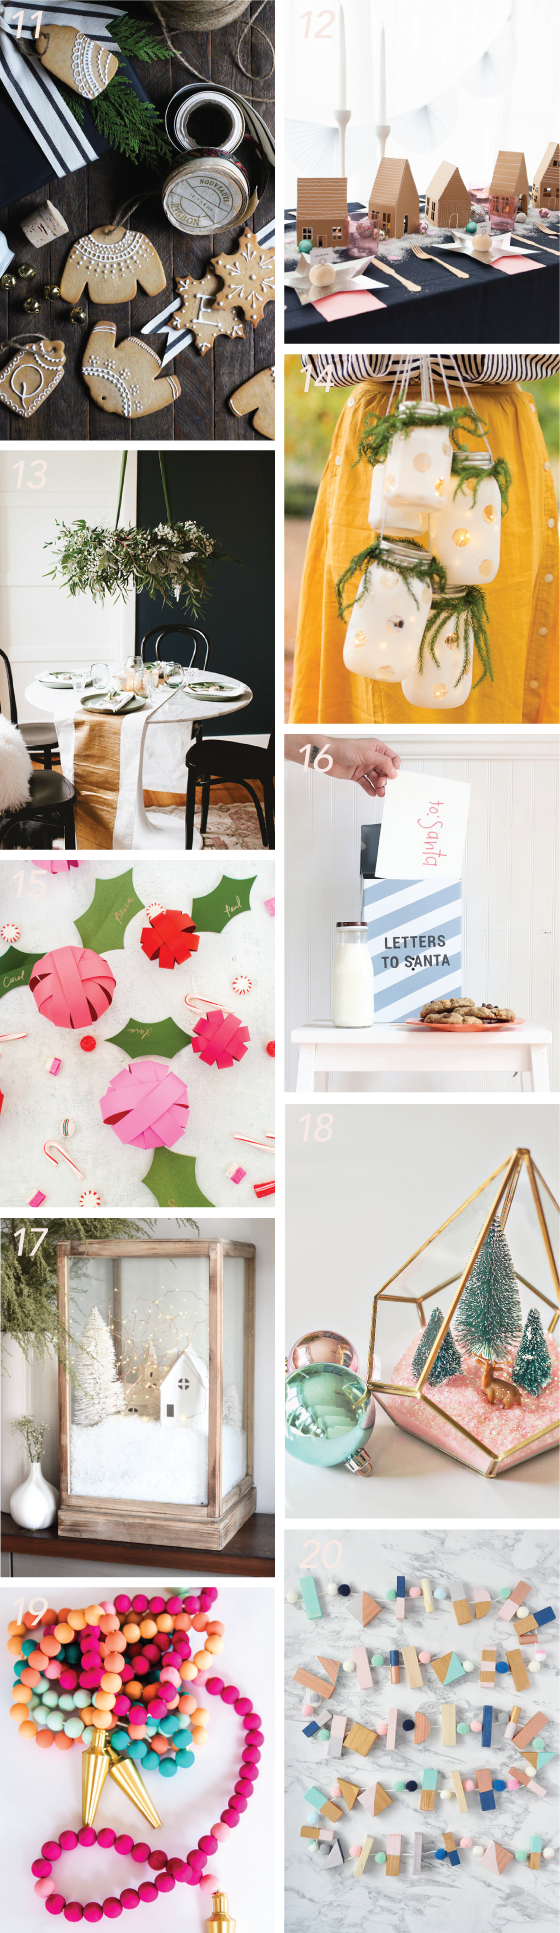
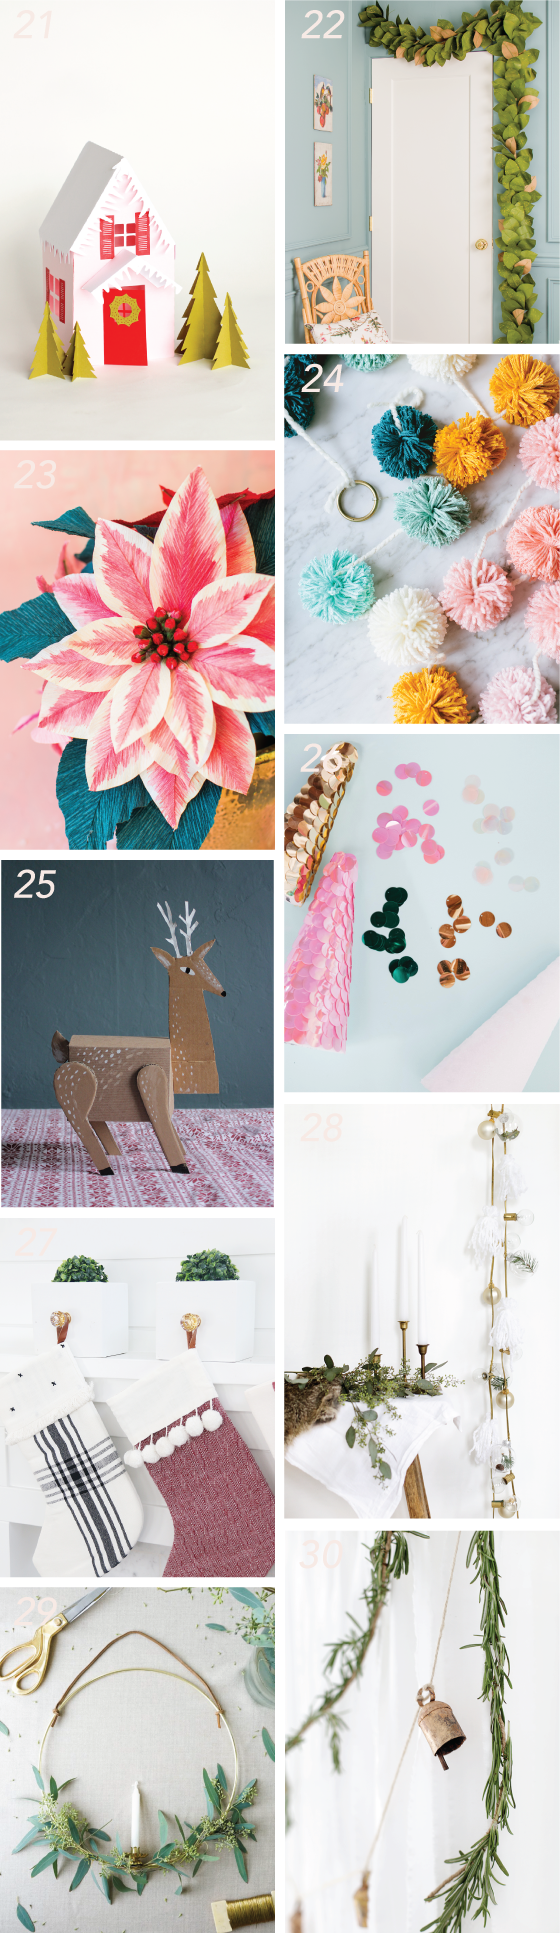
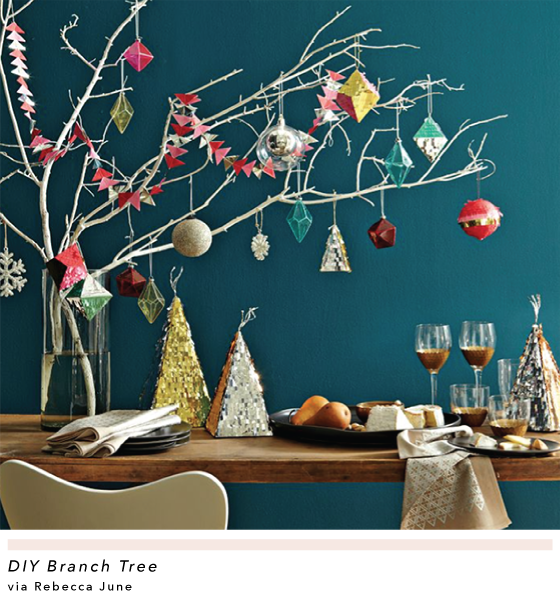
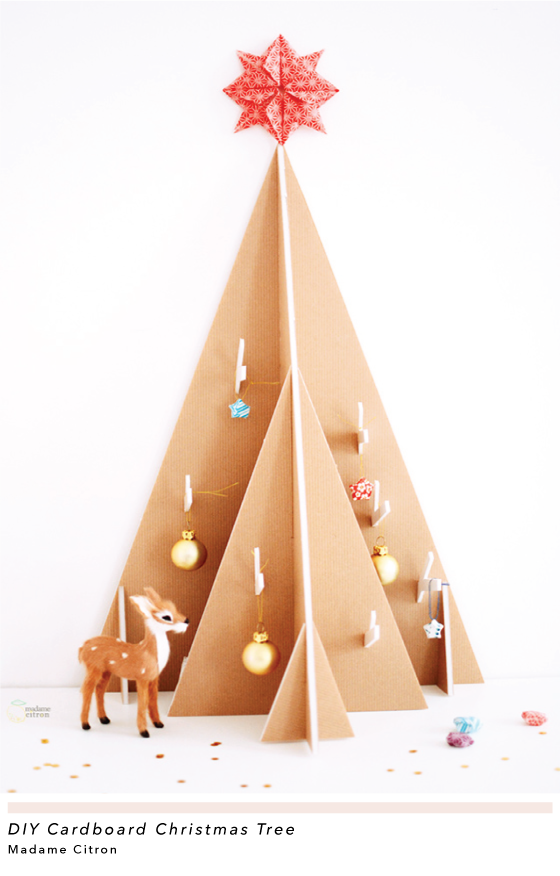
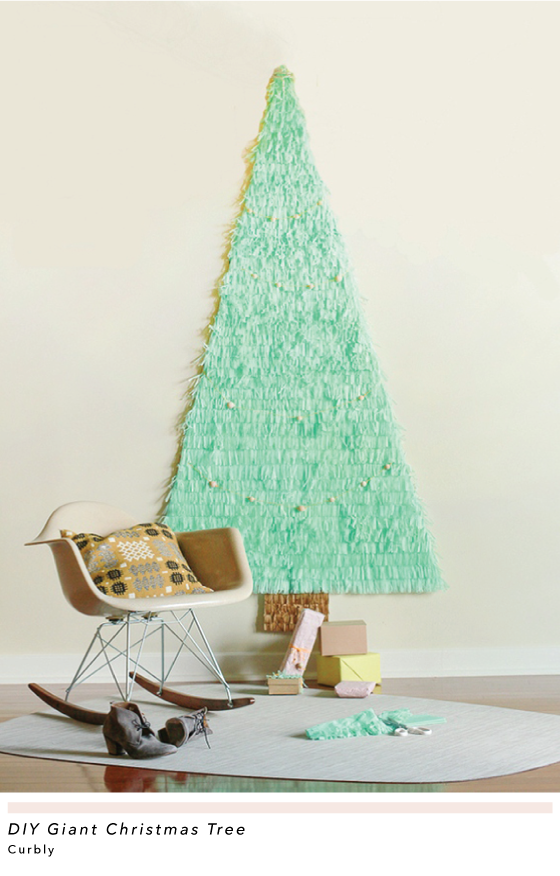
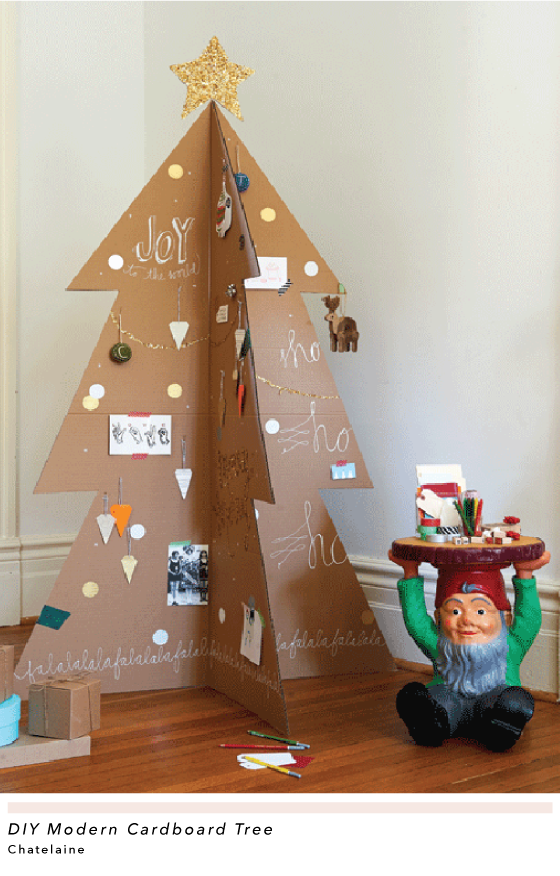
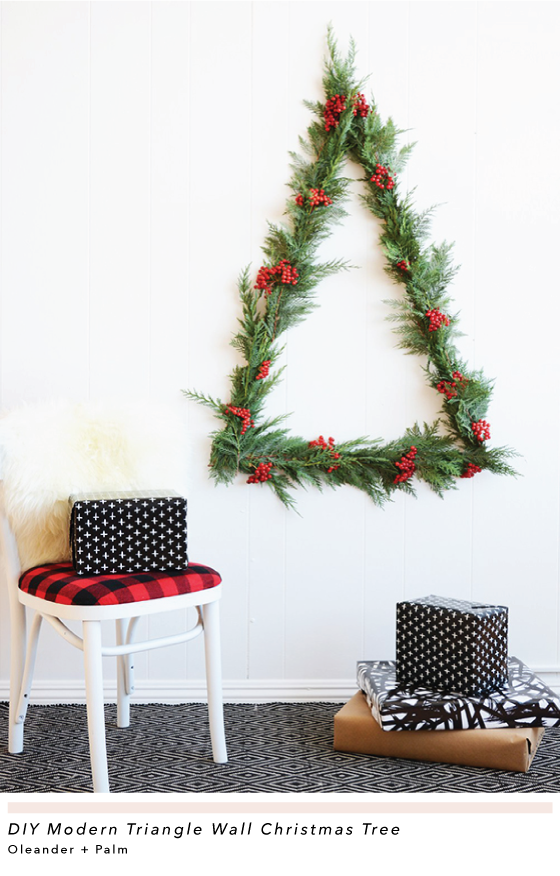
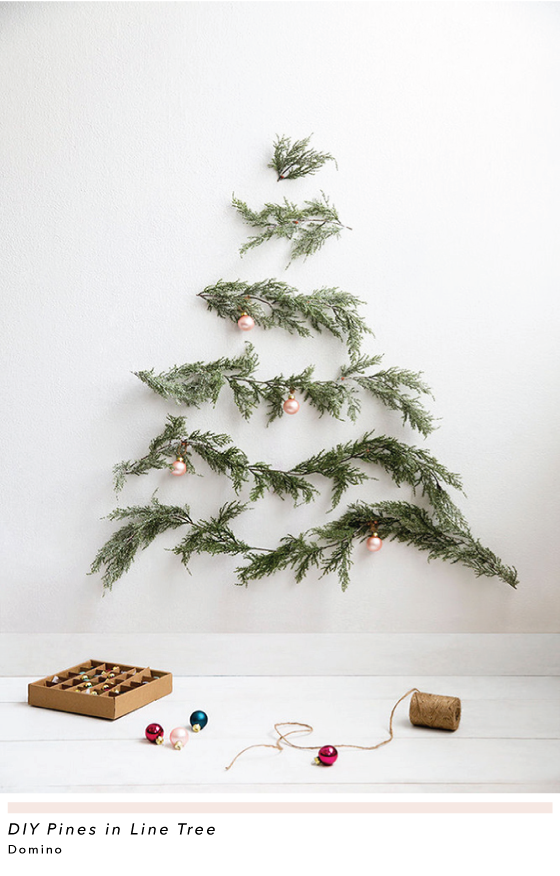
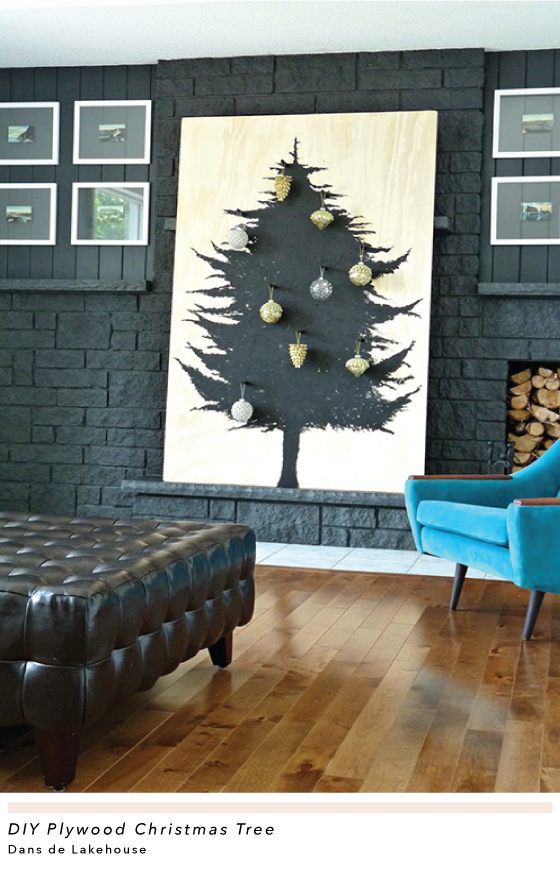
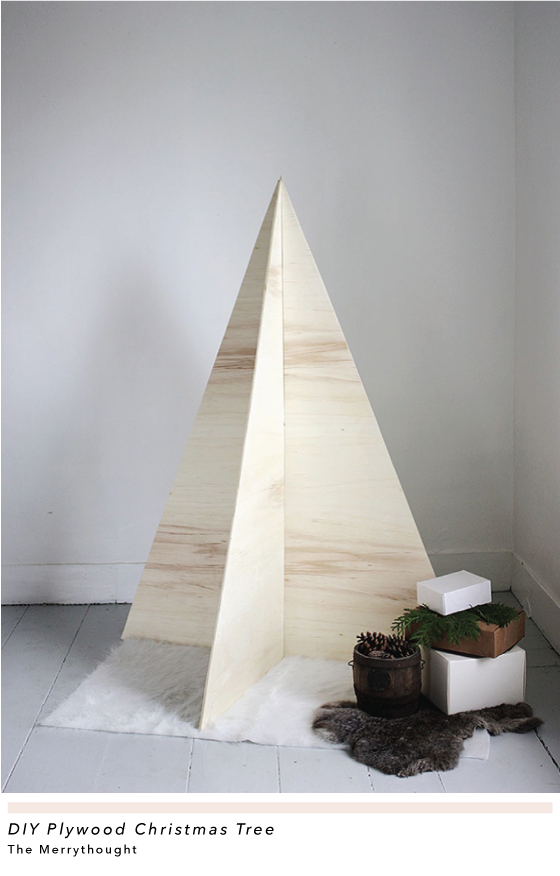
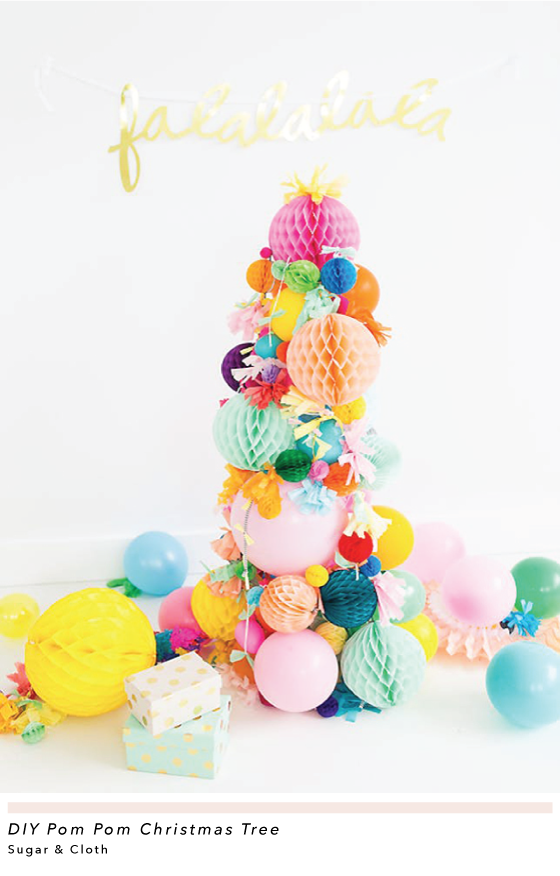
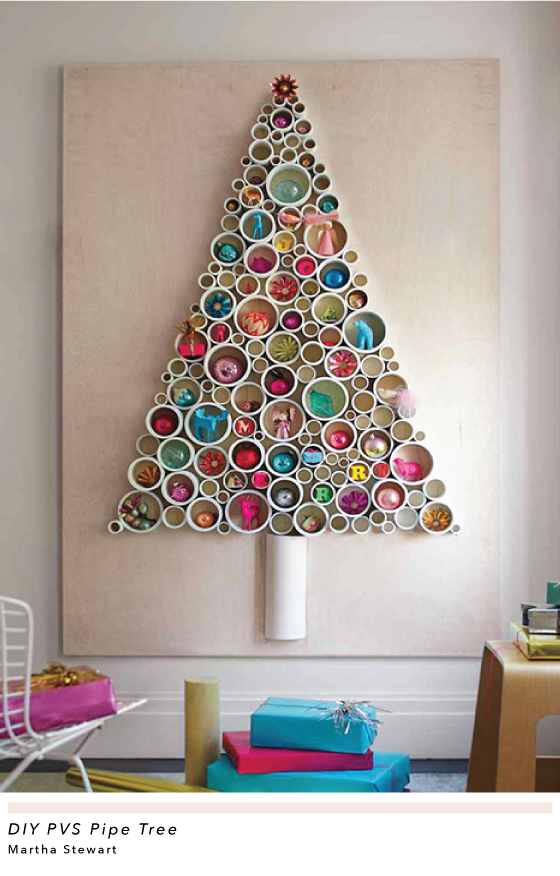
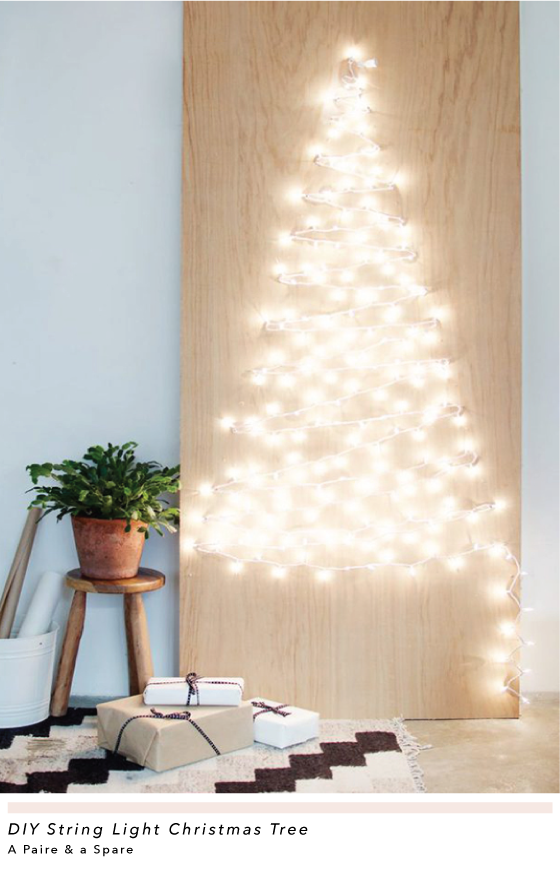
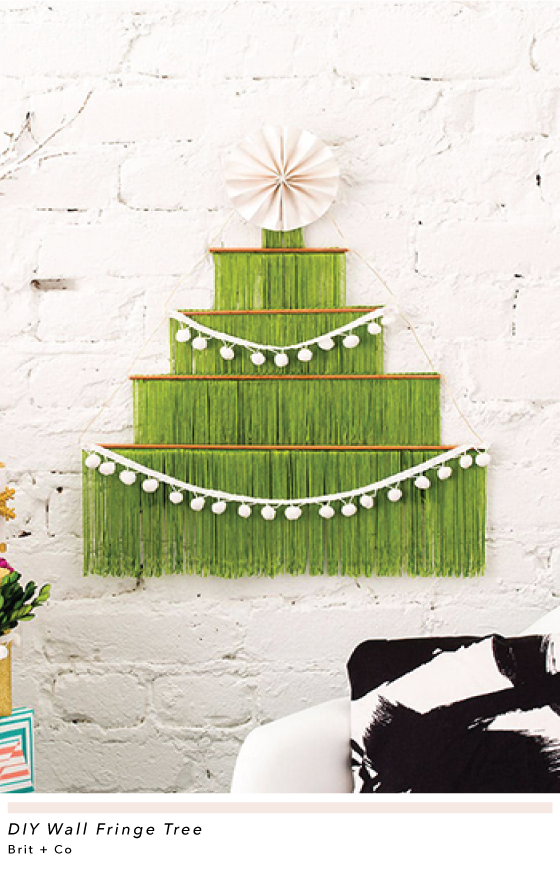
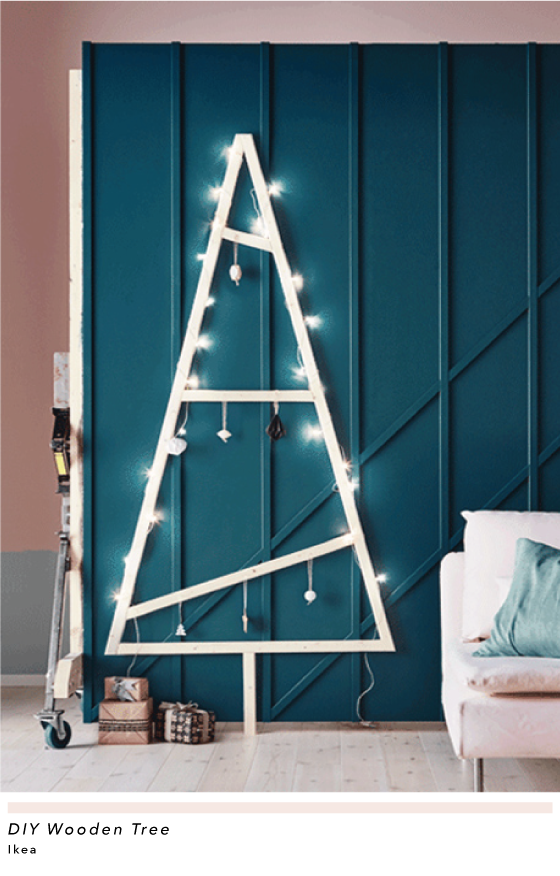
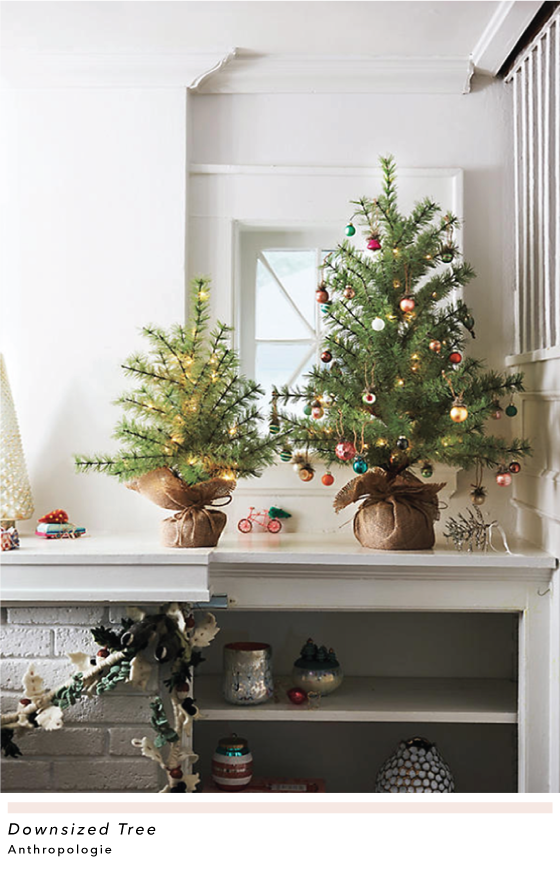
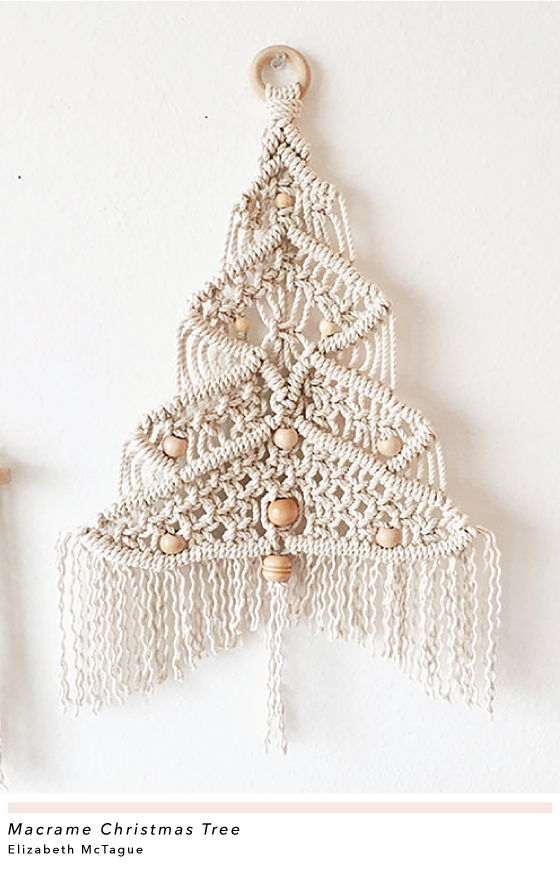
Some Decembers an actual tree just isn’t feasible. Maybe you’ll be gone most of the month and it doesn’t seem worth the trouble. Maybe your place is on the small side and space is at a premium. Maybe money is tight and every dollar is going toward your bills. No matter the case there are plenty of options for making your home holiday ready! Have a look at the twenty options below for inspiration and DIY projects that think outside the tree. (Sorry, I had to.)
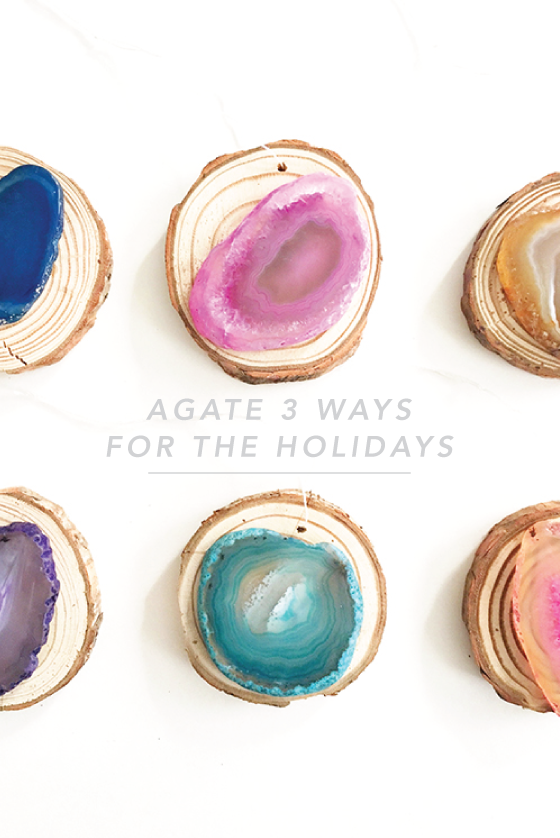
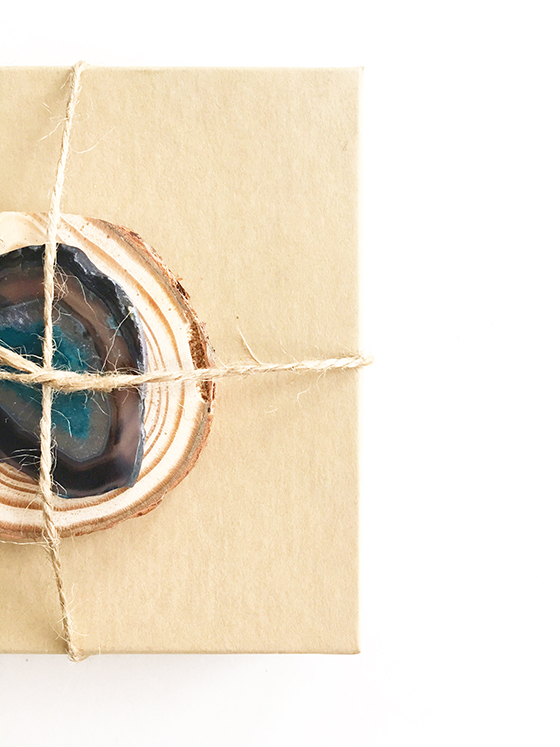
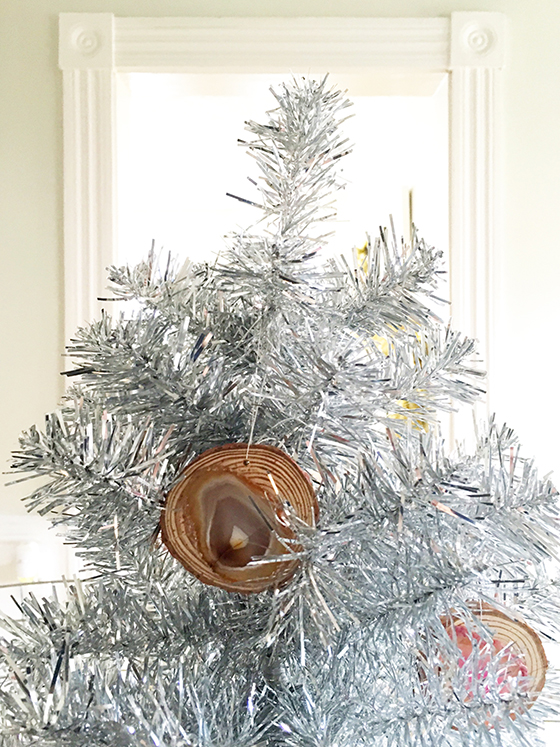
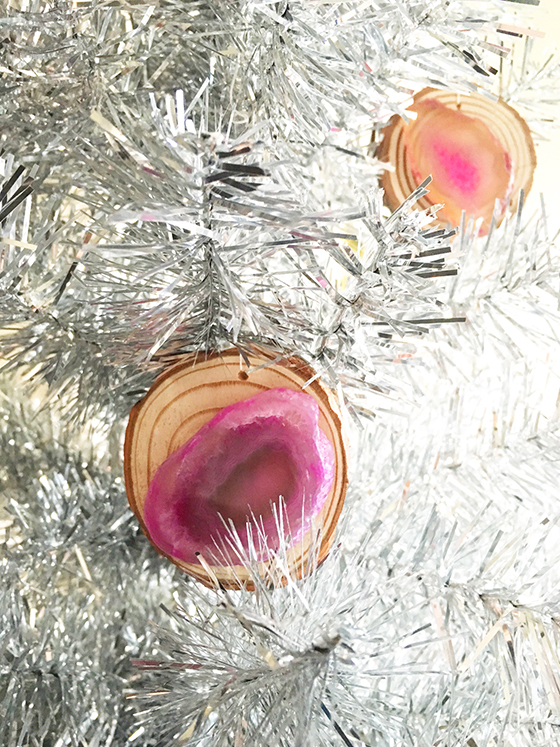
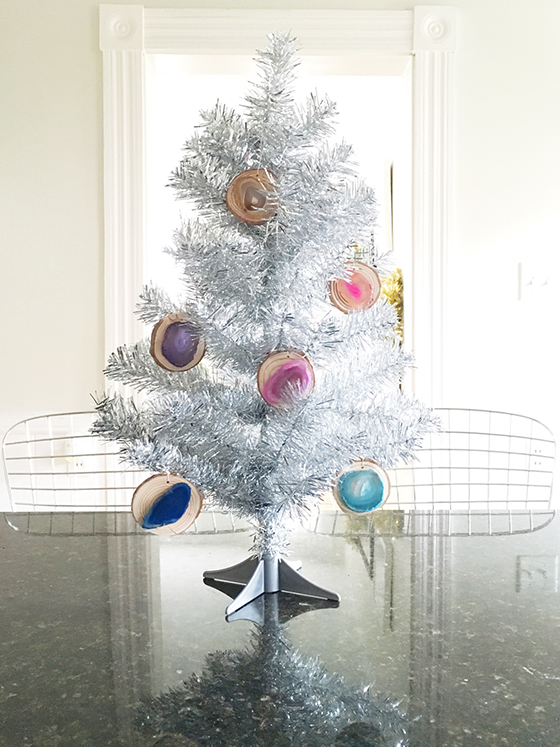
Agate is one of those things that never really goes out of style. Case in point: I still remember the brown agate drink coasters we had on the coffee table when I was a kid! The banded stone has been back in the spotlight for a few years and I’ve been looking for a project that would make it the star. Here are three different ways to use agate and birch slices in your holiday season in three super easy DIY projects. I love how they all turned out and can’t wait to add them to my own festivities and gifts!
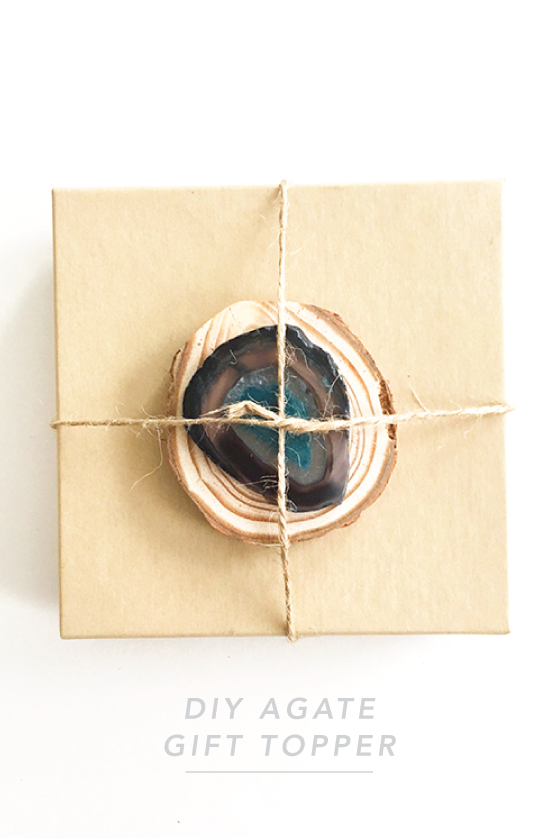
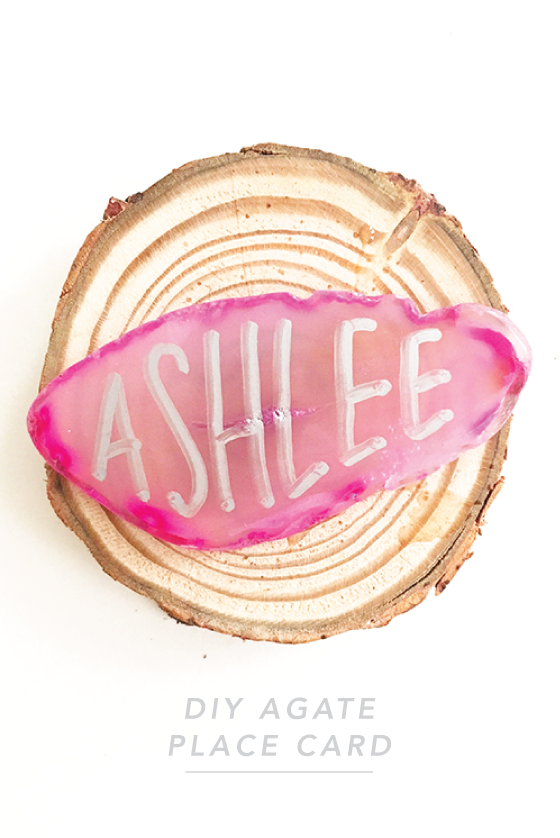
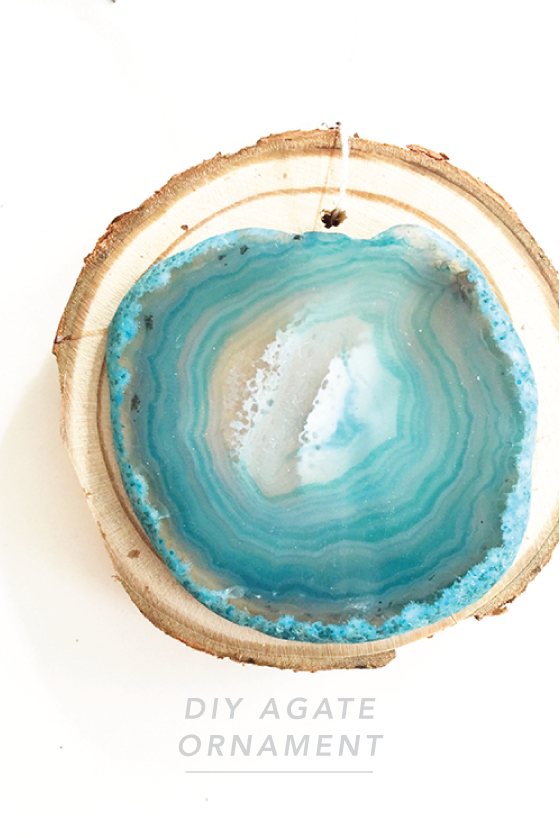
All three of these projects start the same way, by matching up the birch and agate pieces. Once you’ve done that work quickly to place a few drops of superglue on the wood before affixing the stone and pressing together firmly. Because we don’t need the pre-drilled hole for this gift topper, go ahead and cover it with the agate slice. I really like this DIY because sometimes a plain kraft box looks so nice on its own but needs something extra – the gift topper is a sweet little extra that the recipient can keep.
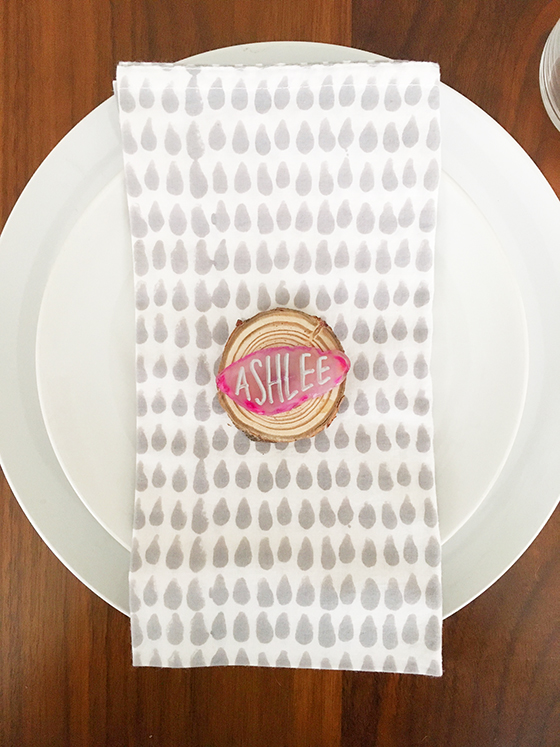
For this colorful birch and agate place card repeat the first few steps from above. Once the two pieces are firmly attached to one another use your permanent metallic marker to write out each guest’s name. I chose to follow the natural shape of the stone with my letters.
Again follow the first few steps outlined above, this time leaving the pre-drilled hole in the birch accessible. You may need to use a small nail or skewer to clear any wood pulp debris from the opening before threading the string and tying a knot. (Use a pair of needle nose pliers if you need a little help pulling it through.) I used 6-inch lengths of single-strand white thread to make it as invisible as possible.